A common day to day task for a DBA is to backup/restore databases for testing/development/production purposes. In this blog we’ll see how to restore database backup to different name.
Let’s first look at the easy way the GUI way. Connect to an instance and
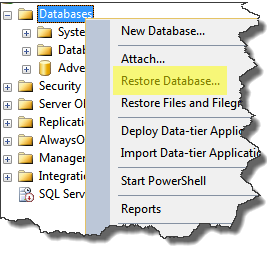
Right click on “Databases” node and select “Restore Database” as shown in below image. This will open a Restore Database dialog box.

In Restore Database Dialog box click the highlighted button to add the database backup device. This will open the Select backup device dialog box.
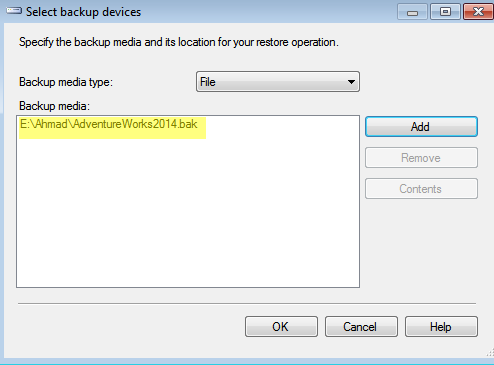
 In the Select backup device dialog box, navigate the folder directory and add the backup device to restore the database from. Click OK to continue.

The database name and the backup file details will be automatically populated in the Restore database dialog box. Change the database name to the new name to be restored too.

On the left pane in restore database dialog box, click on Files and review the file names under Restore As column. SQL Server has automatically changed the filenames from AdventureWorks2014_data to AdventureWorks_Data.
Click OK on restore database dialog box. The restore will start and the progress will be shown as seen in below snapshot.

The database AdventureWorks2014 has been restored as a new database AdventureWorks.
The other way is to use the T-SQL script
USE [master]
GO
RESTORE DATABASE [AdventureWorks] FROM  DISK = N'E:\Ahmad\AdventureWorks2014.bak'
WITH  FILE = 1,
MOVE N'AdventureWorks2014_Data'
TO N'C:\Program Files\Microsoft SQL Server
	\MSSQL12.DMSQL2014\MSSQL\DATA\AdventureWorks_Data.mdf',
MOVE N'AdventureWorks2014_Log' TO N'C:\Program Files\
	Microsoft SQL Server\MSSQL12.DMSQL2014\MSSQL\DATA\AdventureWorks_Log.ldf’,  STATS = 5

GO
The above query restores the backup of AdventureWorks2014 database as a new database AdventureWorks. The database files are moved to AdventureWorks_data with the MOVE command. The STATS=5 command shows the progress of restore operation in an interval of 5%.
Like us on FaceBook | Join the fastest growing SQL Server group on FaceBook
