Hi Folks,
You might be wondering about the steps for the installation of SQL Server 2008 R2. Well I have made some keynotes here:
Once the installation plan has been created and the server is set up to meet the SQL Server requirements, it is time to install the software.
So please follow each and every step very carefully-
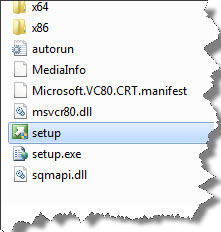
Step 1: Click on “setup.exe”
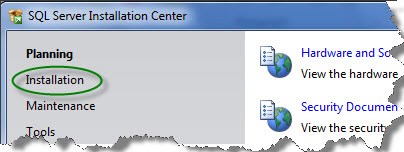
Step 2: Click on Installation
Step 3: Click on “New Installation…” A command prompt window will flash and Setup Rules dialog box will show up.

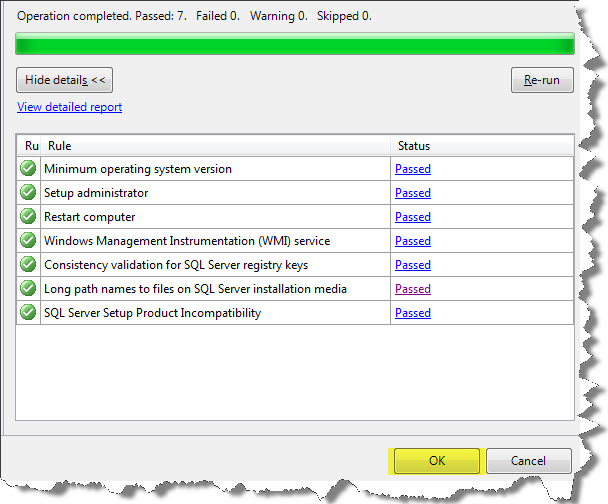
Step 4: You need to make sure that all Setup Rules are passed. If there are failed rules, you won’t be able to proceed. In case of warnings, you can continue to install, but you still should note the warning and take corrective measures, before or after installation. Click on Ok.
Step 5: Click on Next.
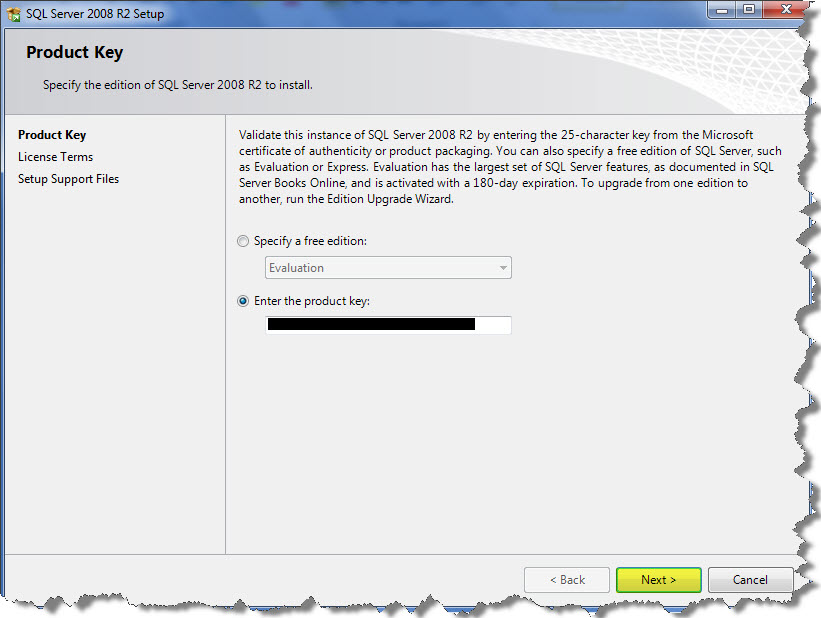
The Product Key page is used to authenticate your license of SQL Server or choose to install a free edition – Evaluation Enterprise Edition, Express Edition, or Express Edition with Advanced Services. Copies downloaded from MSDN often have the product key supplied automatically.
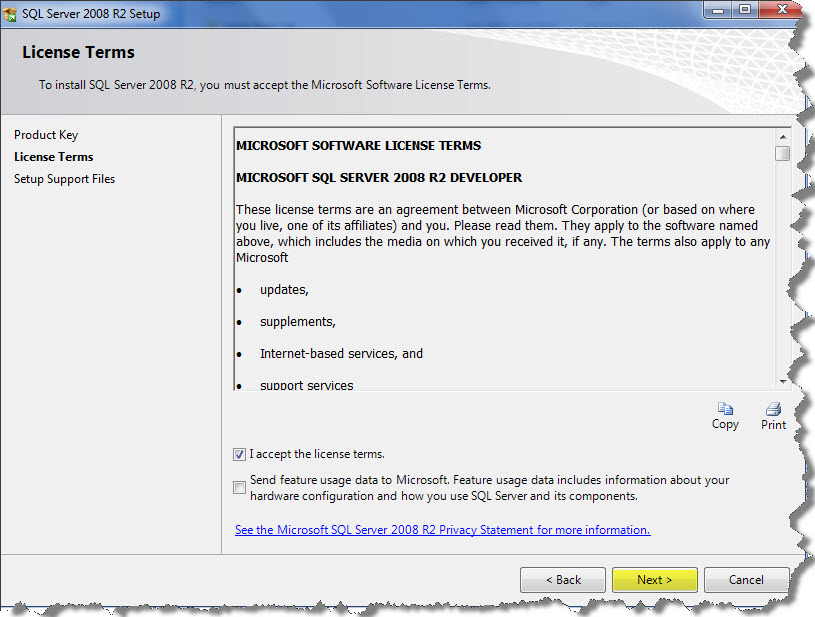
Step 6: Go through the License Terms and if you are agrees upon the terms, then check on “I accept the license terms”. And then click on the “Next”.
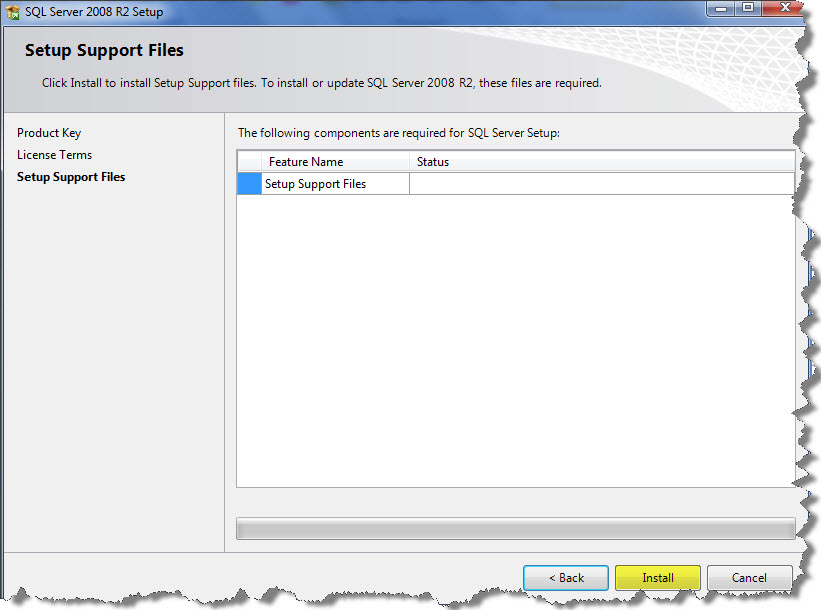
Step 7: Click on the “Install”.
Step 8: You need to make sure that all Setup Rules are passed. If there are failed rules, you won’t be able to proceed. In case of warnings, you can continue to install, but you still should note the warning and take corrective measures, before or after installation.
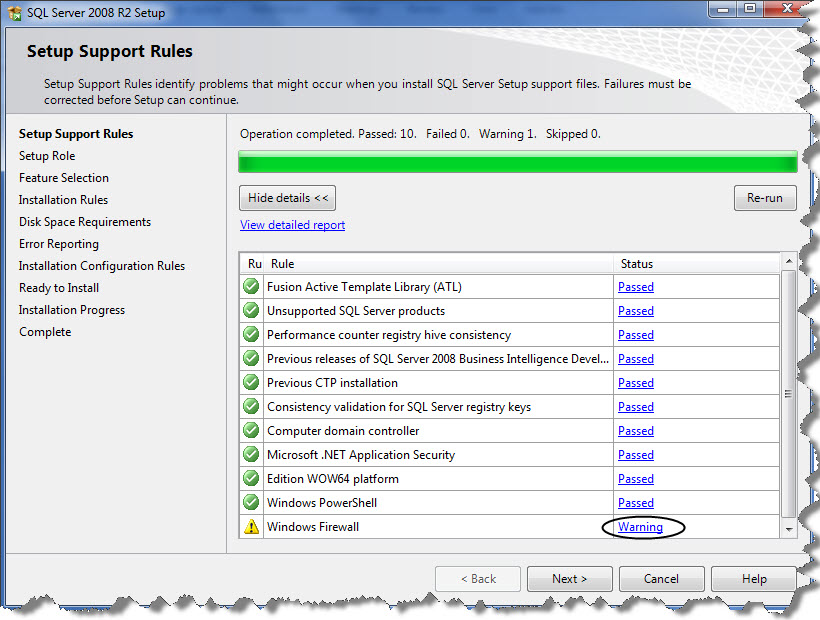
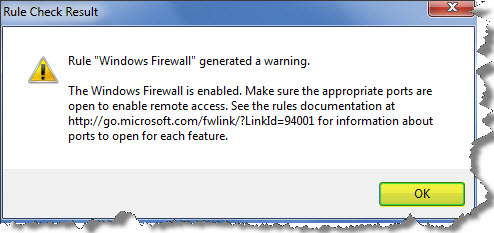
As you will see here there has been Warning upon the Windows Firewall, so its a default warning and you need not had to worry about it. Just check that it should be using the Port No. 1433. Click on the “Warning”. So a dialog box will appear. Click on Ok.
Click on Next button to prooceed it further.
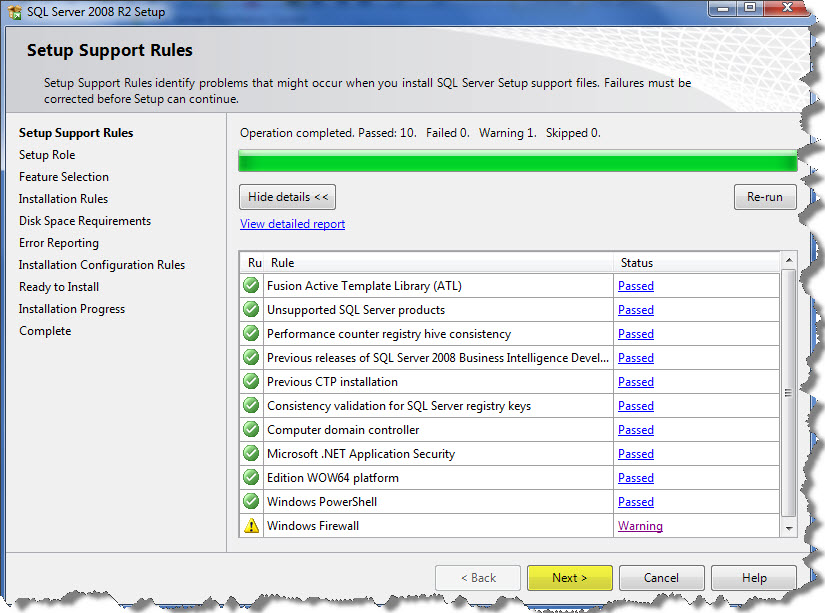
Step 9: Here we have a three kinds of Setup roles available for the installation. ‘SQL Server Feature Installation’ is the installation option which individually selects which feature component to install, or click a feature role to install a specific configuration. ‘SQL Server PowerPivot for SharePoint’ gives users the ability to analyze massive quantities of data, and its seamless integration with Microsoft SharePoint Server 2010 helps IT departments monitor and manage how users collaborate.‘All Features With Defaults’ install all the features using the default values for the service accounts.
We have selected here SQL Server Feature Installation and then Click on Next.
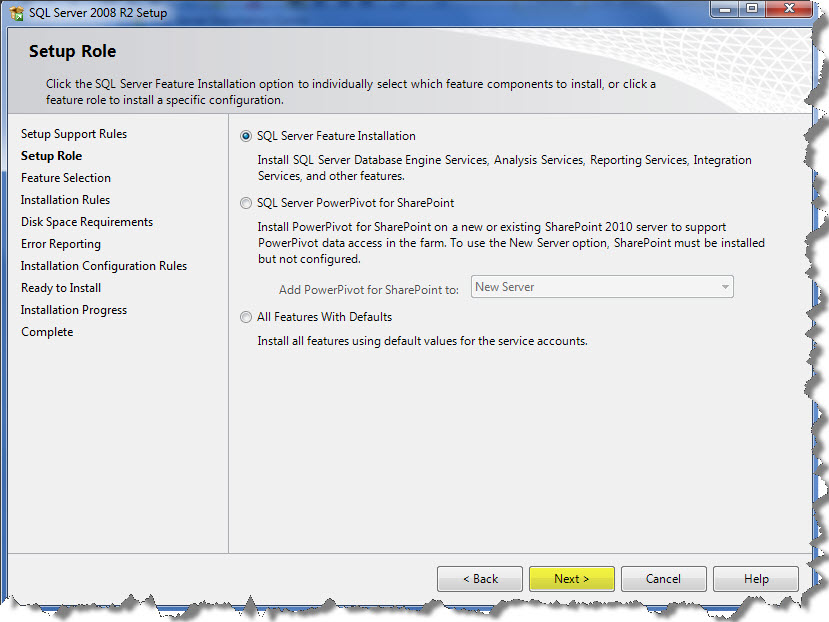
Step 10: So under the Feature Selection, it’s on you what the feature you want to work with. You have the option to either Select All or multiple options can be selected. If you want to feature all of these features, then Click on Select All as I have done.
Step 11: If you want to precede further Click on Next.

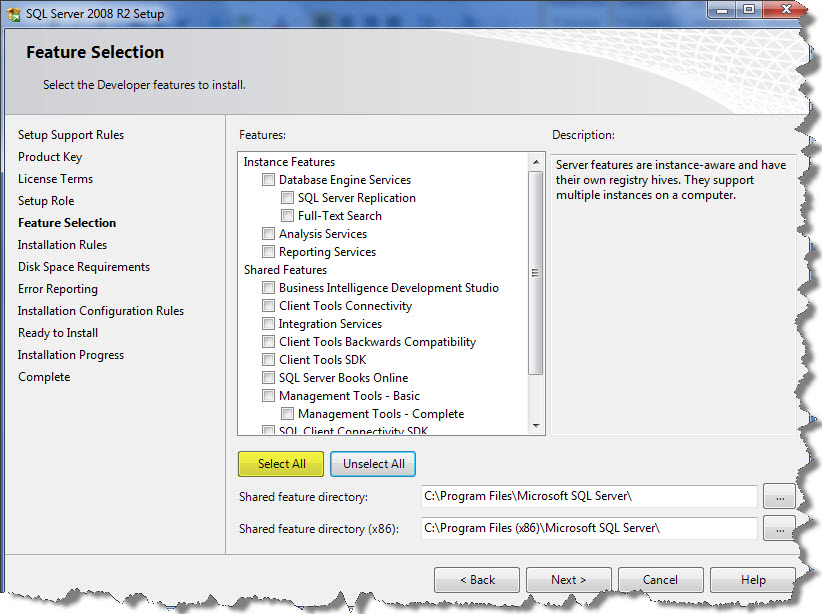
Step 12: Installation Rules are the predefined rule which is being used to check if the Operation are being completed, or blocked. So if there has been any Operation which is being Failed or Warning, certain actions should be taken around before preceding it further.
Click on Next.
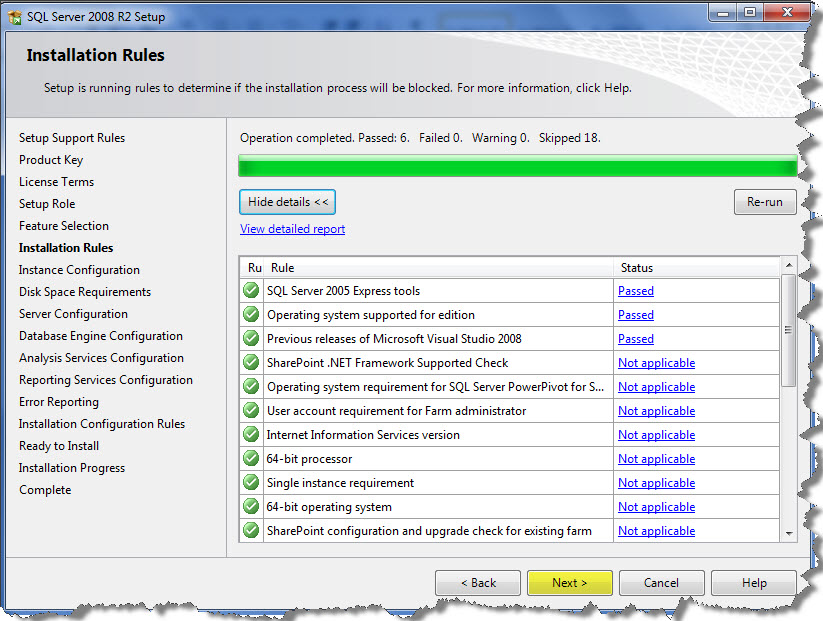
Step 13: Instance Configuration is the crucial part of your installation where you need to choose among the two: Default Instance or Named Instance.
Default Instance is the one under which there an Instance name which is being defined and cannot be changed, and you can have only one Default Instance. But the advantage of having Named instance is that you can name them, so it’s easier for you to identify each one of them uniquely. So we have chosen here Named Instance and specified a name SQLSERVER2KR2.
Click on Next
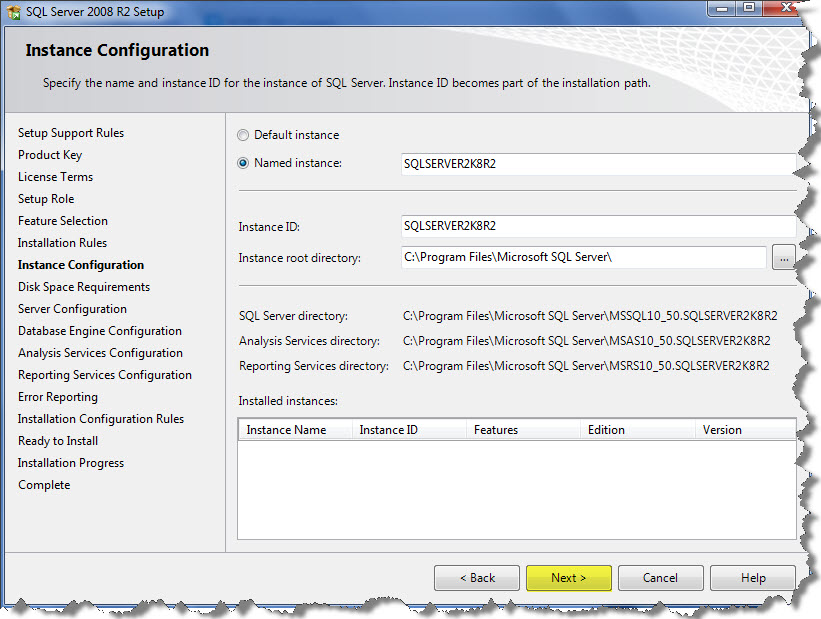
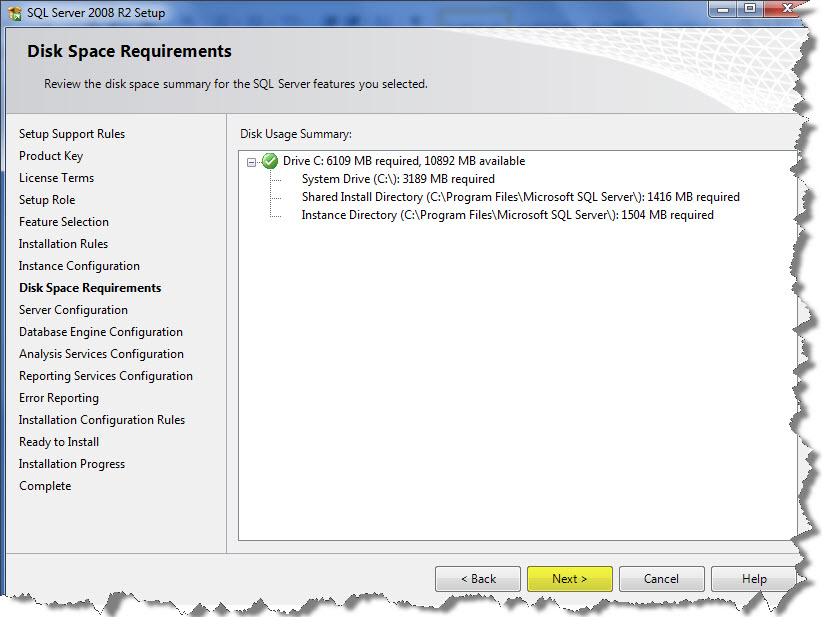
Step 14: Your system should surpass the requirements of space required by the installation process.
Click on Next.
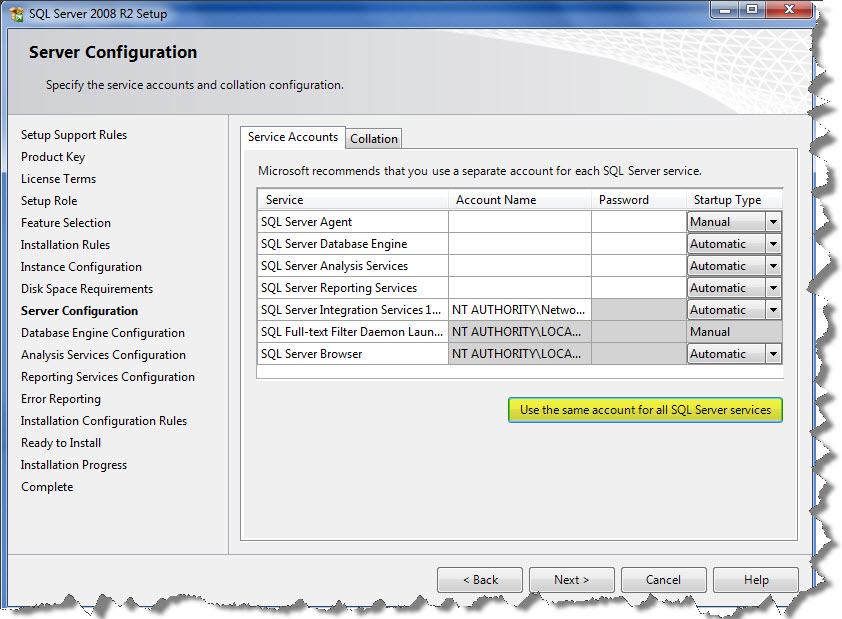
Step 15: Sever Configuration page shows up the service accounts and collation configuration. Click on Use the same account for all SQL Server services.
This page supplies server options for the Database Engine component. Here is where the Windows service account is configured so that SQL Server will have permission to execute and access to files.
Also configured in this page is the initial startup type, which determines whether the services start automatically when Windows starts or whether they require manual starting.
A common error on this page is to miss the Collation tab on this page. The default is probably OK for most installations, but be careful that you don’t miss this important step.
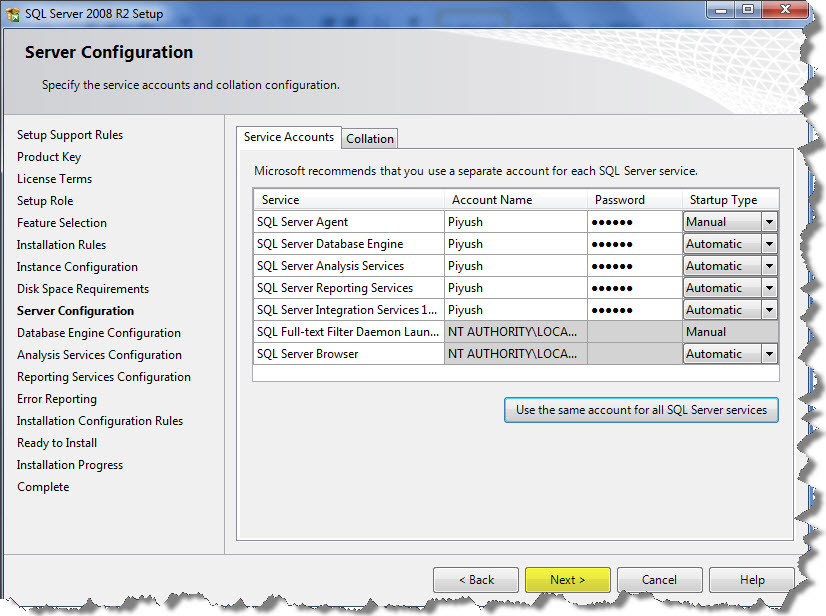
Step 16: After inserting the Account Name and Password, Click on Ok.

Step 17: You can see the account name and password automatically fills up. Click on Next.
Step 18: Click on Account Provisioning tab. Here in the Database Engine Configuration, you have to select the authentication mode out of the two: Windows Authentication Mode and Mixed Mode. Windows Authentication Mode enables Windows Authentication and disables SQL Server Authentication. Mixed Mode enables both Windows Authentication and SQL Server Authentication. SQL Server Authentication becomes very important part when it comes to security, so there should be credentials (login and password) every time that they connect.
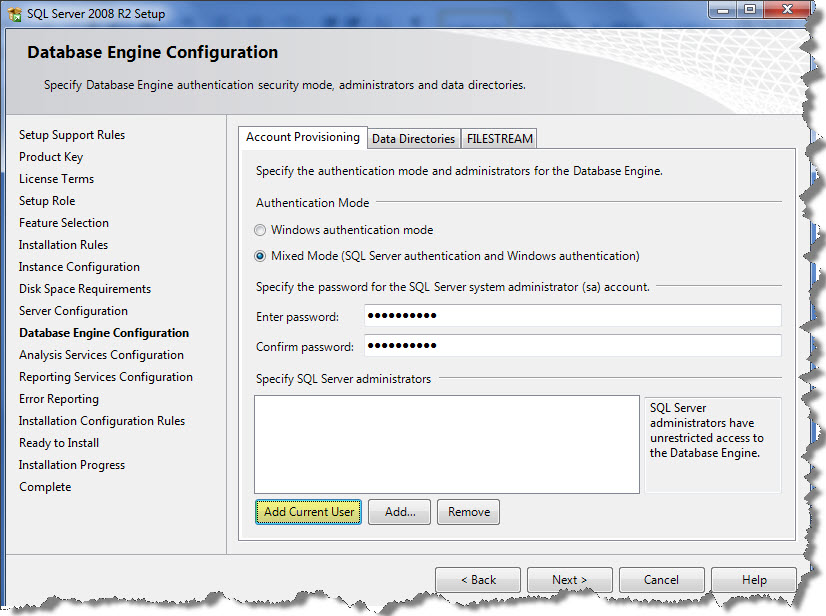
After you enters the password, Click on “Add current user”

Click on Data Directories tab
Ideally the User data and the log files directory should be kept separately from each other which enhance the performance. The same is also is in the case of Temp DB data and log files directory. The Backup directory is also being kept separate from rest of these will either be in Tape drive or other disks.
Click on Next
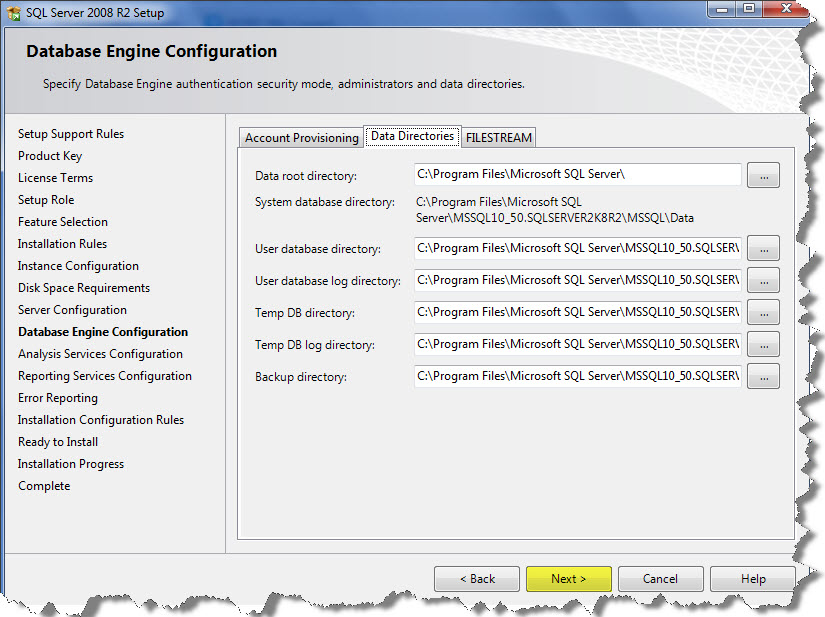
The Filestream tab is where Filestream is enabled for the server.
Step 19: The Analysis Services Configuration page is being used to add initial users with administrative permission and configure the default directories for Analysis Services.
Click on the Account Provisioning tab and then click on the Add Current User button.

Click on Data Directories tab. As we said earlier Data and Log files directory must be a separate one, so it should be follow it again.
Click on Next.
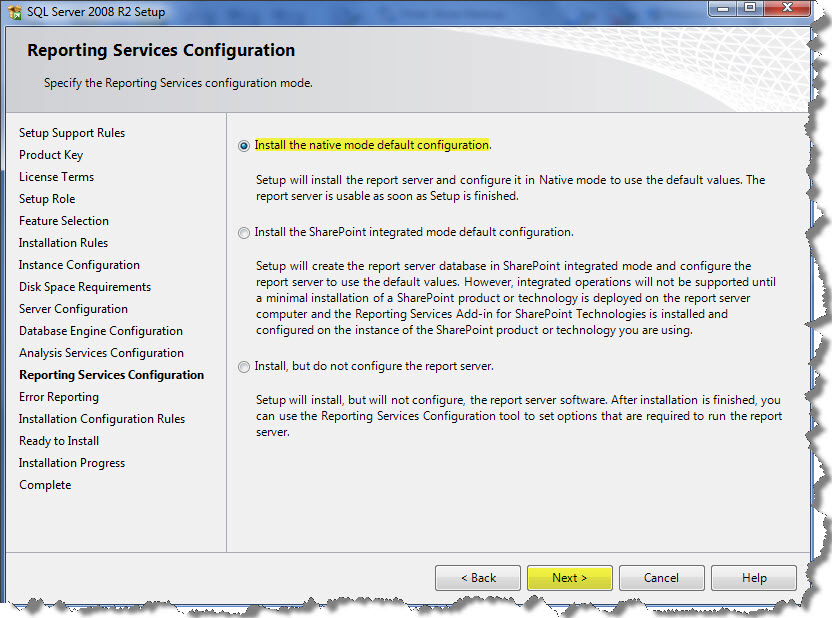
Step 20: The Reporting Services Configuration Page is being used to select the native configuration or SharePoint configuration.
You should choose ‘Install the native mode default configuration’.
Click on Next.
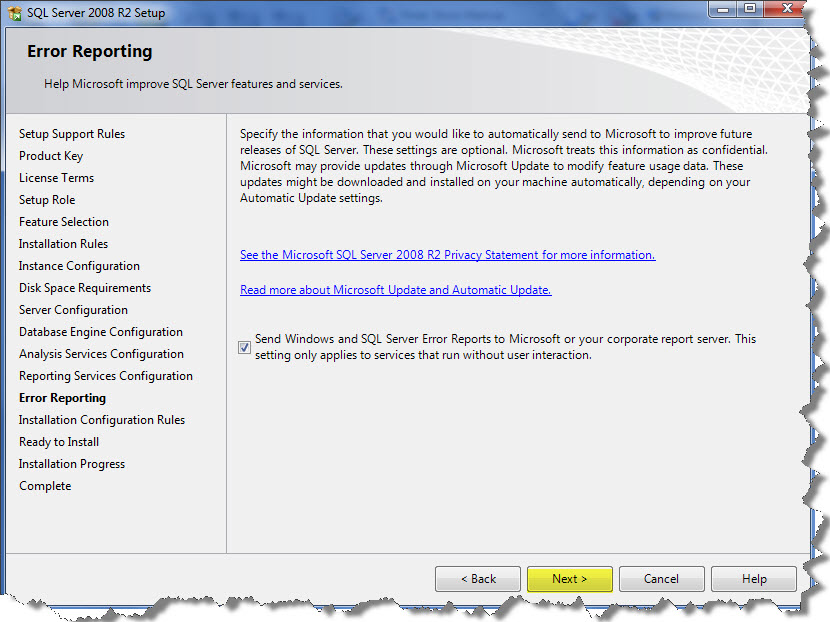
Step 21: Error and Usage Reporting page
The Microsoft SQL Server team really does use this information to collect usage statistics on SQL Server features and error reports. This information is key to determining where the team’s efforts should be invested.
Here check on the “Send Windows and SQL Server …”and then click on Next.
Step 22: Installation Configuration Rules
This rendition of the Rules page verifies the installation Configuration. Click on Next.
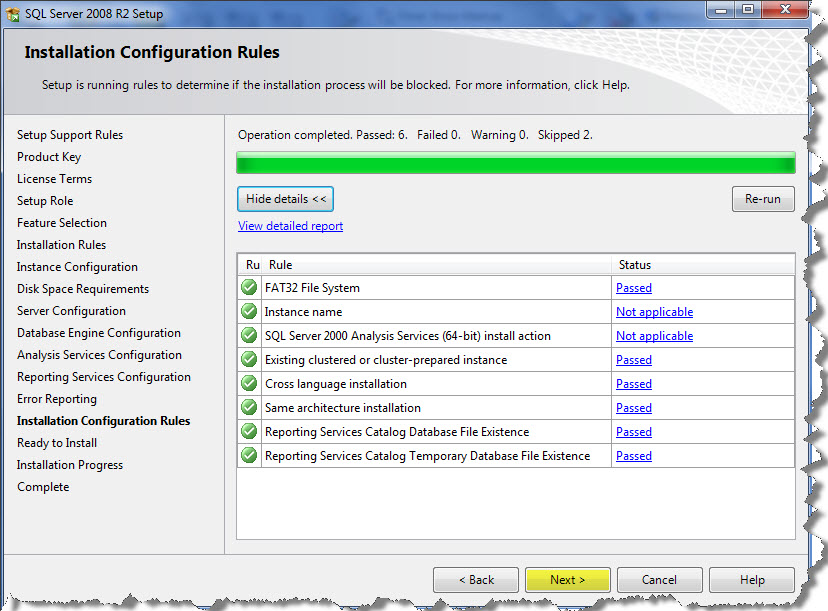
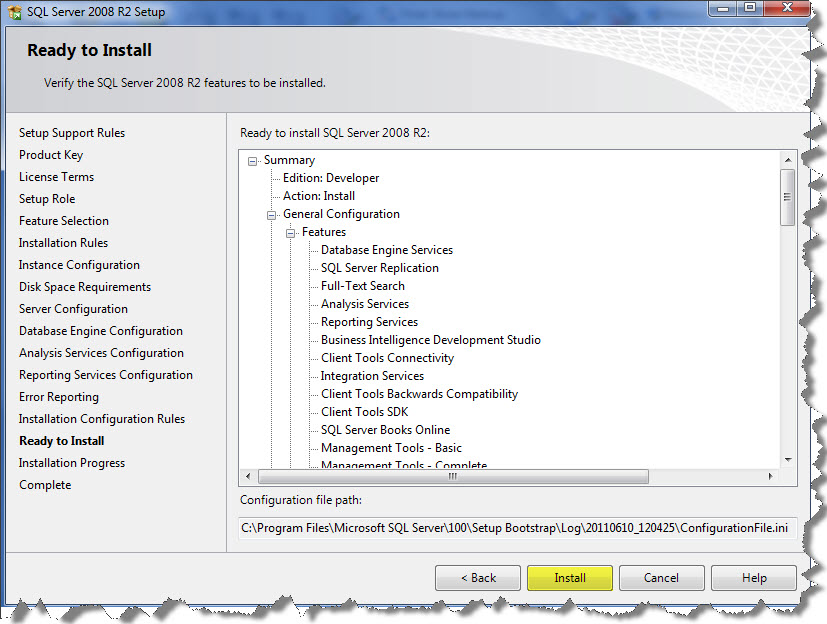
Step 23: Ready to Install
The Ready to Install page reports the complete configuration in a tree view, and the location of the created .ini file with these configuration options.
Click on Install button.
Step 24: Completion Page. The installation for the SQL Server 2008 R2 has been completed. There might be some warnings, let see.
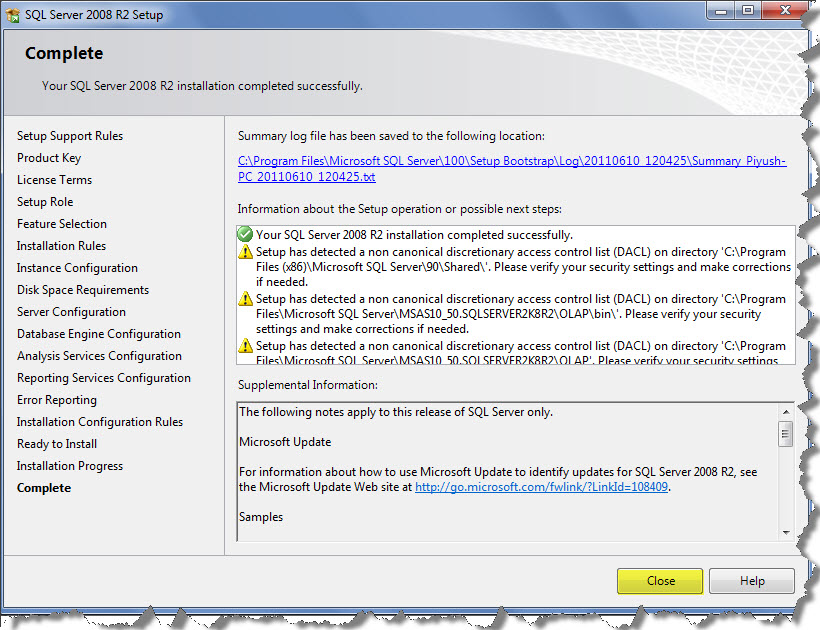
If you will get this warning, then carefully perform for each and every warning:
- Setup has detected a non-canonical discretionary access control list (DACL) on directory ‘C:\Program Files (x86)\Microsoft SQL Server\90\Shared\’. Please verify your security settings and make corrections if needed.
Select the folder ‘C: \Program Files (x86)\Microsoft SQL Server\90\Shared\’ -> Right-Click -> Properties -> Security Tab -> Edit. Then the error will show up that the permissions are not proper; do you want to order them? Click Reorder and add permissions.
- Setup has detected a non-canonical discretionary access control list(DACL) on directory ‘C:\Program Files\Microsoft SQL Server\MSAS10_50.SQLSERVER2K8R2\OLAP\bin\’.Please verify your security settings and make corrections if needed.
Select the folder ‘C:\Program Files\Microsoft SQL Server\MSAS10_50.SQLSERVER2K8R2\OLAP\bin\’ -> Right-Click -> Properties -> Security Tab -> Edit. Then the error will show up that the permissions are not proper; do you want to order them? Click Reorder and add permissions.
- Setup has detected a non canonical discretionary access control list(DACL) on directory ‘C:\Program Files\Microsoft SQL Server\MSAS10_50.SQLSERVER2K8R2\OLAP’. Please verify your security settings and make corrections if needed.
Select the folder ‘C:\Program Files\Microsoft SQL Server\MSAS10_50.SQLSERVER2K8R2\OLAP’ -> Right-Click -> Properties -> Security Tab -> Edit. Then the error will show up that the permissions are not proper; do you want to order them? Click Reorder and add permissions.
Hope you got it understood well 🙂
And also comments on this!!
Regards
Piyush Bajaj
Like us on FaceBook | Follow us on Twitter | Join the fastest growing SQL Server group on FaceBook
Follow me on Twitter | Follow me on FaceBook

Action requires konweldge, and now I can act!
This article is very much useful as I think. The description is too good. I was looking for such article.
Great work! One thing though, the steps appear to be out of order. For me, Steps 5 and 6 appeared after Step 8.
Thanks for posting! Very helpfull.
Hi Piyush,
I have installed SQL Server R2 but i am unbale to connect with user name and password by selecting Server authentication. Please help
Ashwani:
1)Did you provide an sa password?
2)ensure your caps lock was not enabled?
3) if you added your account in Specify SQL Server Administrators then select “windows authentication” to login
hey…thanq vei much 🙂
ur post helped me greatly !
I cannot add External data file. when i add external data file .mdf then error masage come to my display.. please help me .how to add external data in Database Engine.
3 important basis points missed / I can’t find in your post are :
– which edition of SQL Server developer OR ?? and 32-bit OR 64 you used ?
– OS : on which you did installation ( Windows 7 Pro OR Windows Server 2008 etc ? )
– if this install was on CLEAN machine ( no previous installations of SQL server etc )
Problem : Large number of Links report serious headaches
when trying to install on Windows 7 ( say on a laptop )
almost NO good SQL Server book has this installation done on Windows 7
Book authors play safe and do not indicate OS they used
except 1 book ( SSRS by Jayaram Krishna Swamy isbn – 978-81-8404-781-3 / see pg 14 )
has it on Windows XP
but some authors do say DBA prefers clean slate ( machine ) to begin with
then installation success chance is very high
In your post you have not indicated Screen Shots taken ON machine ???
If you can help me…..
Problem : Large number of Links report serious headaches
when trying to install
sql server 2008 r2 install problem
on Windows 7 ( say on a laptop )
almost NO good SQL Server book has this installation done on Windows 7
Book authors play safe and do not indicate OS they used
would love to buy if such a book is suggested
except this book ( SSRS by Jayaram Krishnaswamy
isbn – 978-81-8404-781-3 / see pg 14 )
has it on Windows XP
ALSO, some authors do say DBA prefers clean slate ( machine ) to begin with
then installation success chance is very high
my Request now : if you can indicate if
sql server 2008 r2 developer edition
can be installed problem free
on Windows 7 professional ( it’s CLEAN new laptop )
Great install guide. Thanks
I have watched many videos and read also a lot about how to install SQL 2088R@
But this was very helpful to me, it gives a lot of info
thanks
I’m trying to install on my computer running Windows 10, at the time to select 17 they show an error because say “Can’t validate this user”, I try in many ways but always get the same error.