Hello!
We at SQLServerGeeks.com are committed to spread the knowledge as we gain in the process of evaluating the newly released SQL Server 2012 CTP 3 release code named “Denali”.
This post comes as a supplementary addition to the earlier post which can be found here.
In this post we shall have a walkthrough on how to create perspectives in a tabular project.
A perspective can be literally resolved to a common term – VIEW as in the SQL terminology.
The purpose of a view is to encapsulate the underlying complexity of the modeling entity and thereby adding a “layer” on top of the entire project which user would like to interact with.
So, as a data modeler, perspectives are a great feature which can provide end business users with ease of project entity navigation. Perspectives are not designed to secure modeling entities in any project. We should always resort to creating “Roles” thereby allowing a set of users to see what they are authorized to view and interact.
As shown in the graphic below, the feature to access Perspective can be accessed by clicking the Model menu and now click the Perspective or more conveniently by the key combination of Alt+O+P.

This will now present you with a new perspective window which is depicted below in the graphic

From this window, one can create, edit, rename, copy and delete perspectives, if any.
Let go ahead and create a perspective with say {Geography, Customer and Internet Sales}
Check the necessary fields that you want in your perspective and click on OK. By default, if no name is provided to the newly created perspective, it is named as “New Perspective”
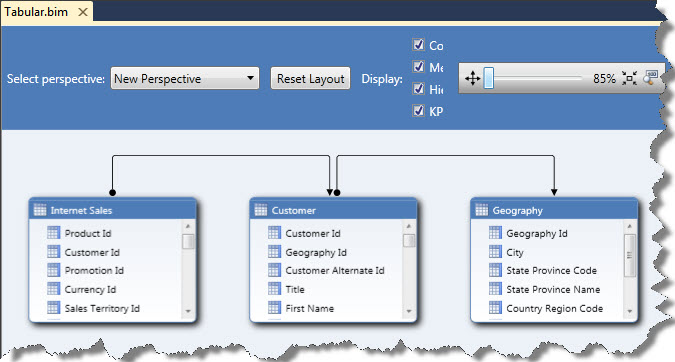
Now to view the perspective one can either use the “Analyze in Excel” feature or just select the Model à Model View àDiagram View and select the perspective from the drop down. One may refer the graphic shown below
That’s all. Happy learning!
Regards
Raunak Jhawar
Like us on FaceBook | Follow us on Twitter | Join the fastest growing SQL Server group on FaceBook
Follow me on Twitter | Follow me on FaceBook
Hi Raunak,
I executed exactly the same steps as what you did in your tutorial, but the created perspective doesn’t appear when I click on OK. I have tried it several times, and each time with another selection of tables. Also creating a new Visual Studio solution didn’t help. Is there a hidden feature that hides the created perspective or something?
Thank you in advance!