SQL Server Microsoft Excel – Power Query formerly known as “Data Explorer”, when it was launched for community preview, is an MS Excel Add-in to enhance self-service BI and Analytics user experience using Excel as a data platform. The add-in can be downloaded from http://www.microsoft.com/en-us/download/details.aspx?id=39379.
In this post, I’ll demonstrate a use case for Power Query which can be used for data modelling and structuring the data for quick analysis.
Once you have downloaded the add-in and installed the executable, you can access Power Query from the ribbon shown here:

In case after successful installation you do not see this option, you can manually enable the Power Query option by navigating to Options à Add-ins à Under Manage Drop Down select COM Add-ins à Check the Microsoft Power Query for Excel and click on OK.
Here let’s create a data model and later a Power View report using Wikipedia page as a source. For this select the data source as Web.

This will open a dialog box where you can enter the URL of any page which has “tables”. Here I am using the URL for my data model.
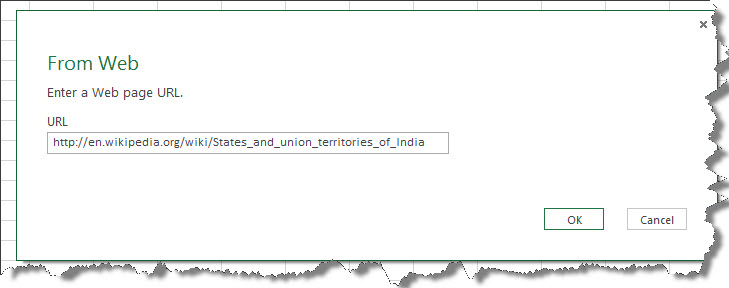
Click on OK and this will open the Power Query editor console.
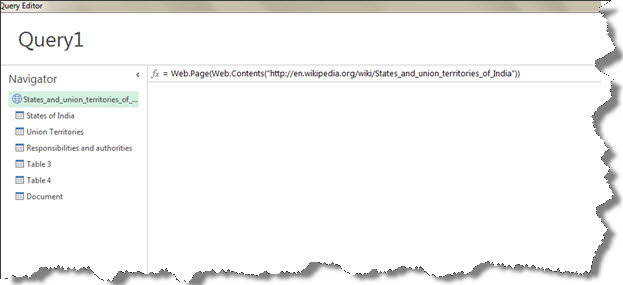
On the left is the list of all tables which were found while the page was scanned. In the middle you can see the familiar formula bar which highlights the current URL under study. On the left (not shown in the image) is a horizontal bar which will list all actions or steps taken while modelling the data. The steps can be rolled back at any stage as the metadata is persisted all along the session. There is a button “Done” which will transpose the model back to Excel once the design is completed for further analysis. Click on the option States of India and the data pane will pop up the associated data found on the page.

Similarly, you can select other tables like Union Territories and the associated data will be displayed on the data pane.
Now we have a raw data available, let’s model the data with only necessary columns in necessary format for the reporting purpose. At this stage, you can add or remove columns. To remove column(s) from the model, select a column right click and click on Remove Column option. Also, to keep the selected column list and remove all others, there is an option called as Remove other columns, as shown below
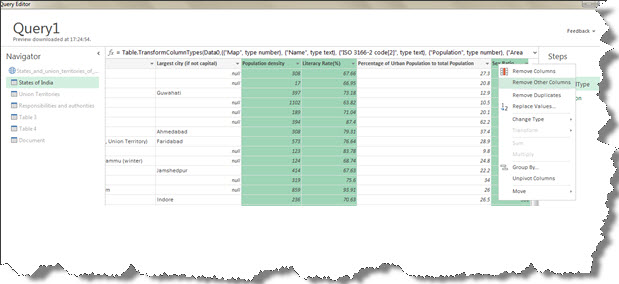
This action will drop all columns except the ones highlighted. The resultant action will produce the following schema. The horizontal bar you see on the right is the Steps bar which I’d discussed earlier. This is a list of all actions which has taken place on the original data.

This is the final outlay of the data model. You can apply several operations like renaming a column, removing duplicate columns, grouping the data and applying aggregate functions like SUM, MIN, MAX etc. on the column data along with the grouped column. Once you click on Done, the data model is exported to a new Excel sheet.
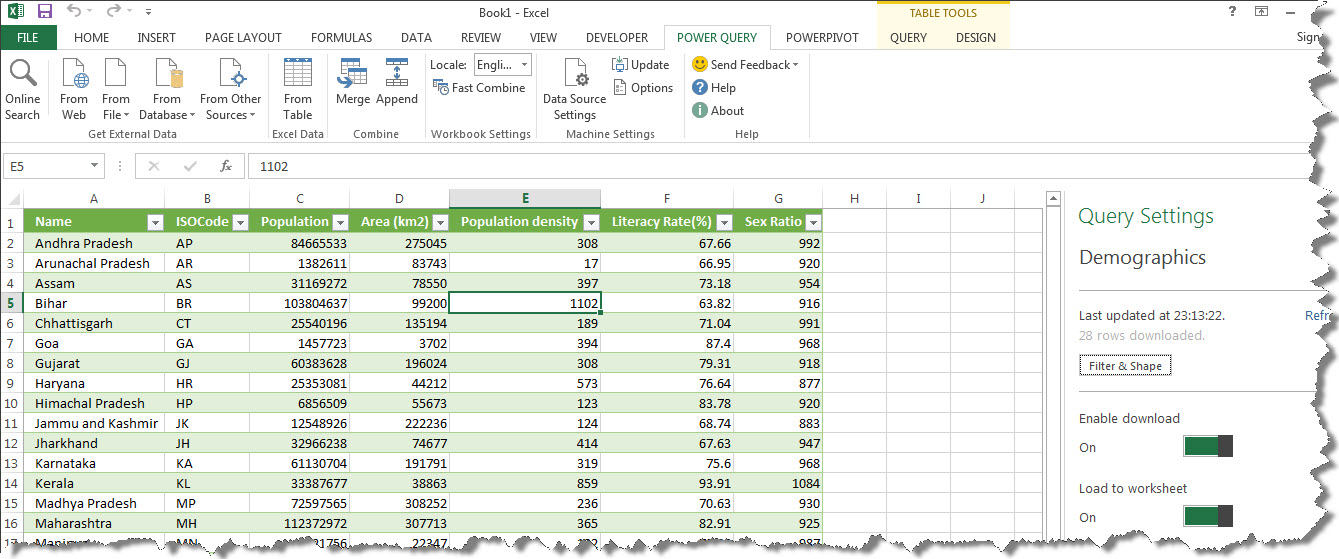
Now as the data model is ready, it can be used to create reports for analysis using standard pivots or charts or using Power View reports or even Power Maps. You can also add this model to Power Pivot as a table by click on the option Load to data model (not shown in the image) under Query Settings.
Let’s create a Power View reports using this data. Ensure that you have downloaded and installed Power View for Excel and the add-in is enabled. Click on Power View from the Insert Tab and select Power View.
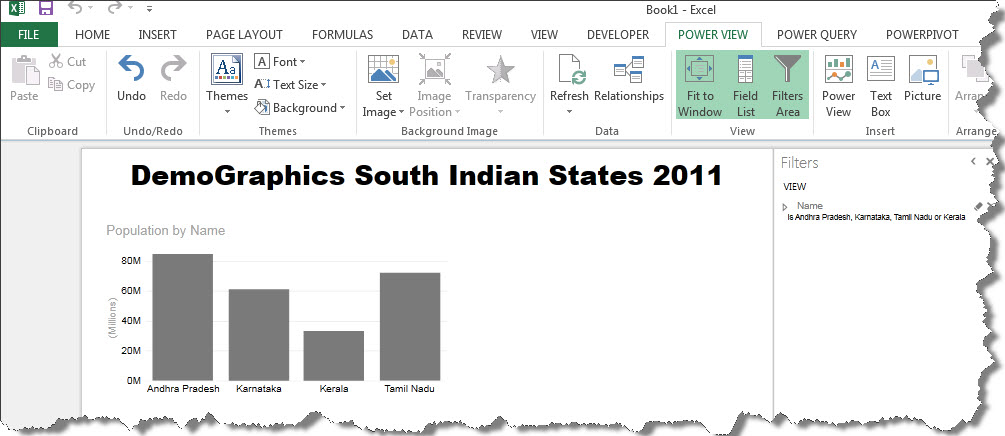
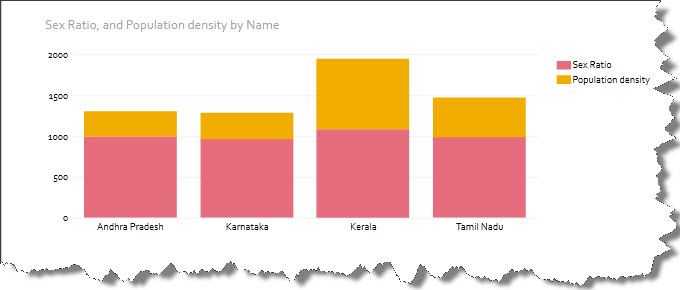
The idea presented here is that no longer the data sources for reporting and presentation purposes be structured a set. Even unstructured sources like web logs and web pages now can be mined for analytics. This is one such example presented using a web page as a source.
This is the first in series of blogs for PowerBI. Tune in for more posts next week. Till that time, Happy learning
Regards
Raunak Jhawar
Like us on FaceBook | Follow us on Twitter | Join the fastest growing SQL Server group on FaceBook
Follow me on Twitter | Follow me on FaceBook
